Showing posts with label makeup. Show all posts

Thursday, January 3, 2013

Eye Corrections, or, Fixing Your Face.

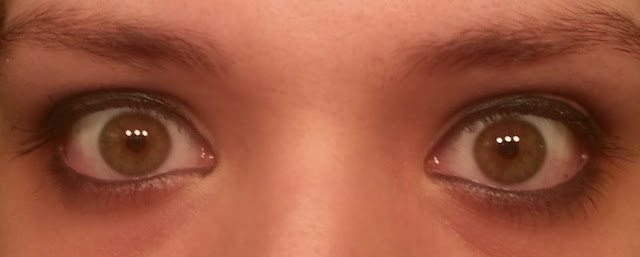
Following in the stride of my post on lip corrections, we now embark on the journey for the perfect eye. It may seem like a daunting task, but it really is simple if you know what you're doing.

First things first - there's no such thing as the perfect eye. It all depends on our own personal taste and facial structure. What may work for one person with wide-set eyes may not work for another; same goes for any other eye category. Eye shapes aside, in this post we will be discussing four different eyes and how to correct them. Note: the title headings are the eye type we're correcting, that is, for the section on narrow eyes, we are making the eyes seem further appart.


Narrow Eyes

Widening the eyes is probably the most common practice in makeup today - this is the look that most, not everyone, will be going for. Widening the eyes is a matter of drawing attention to the outer corners and leaving the inner corners open and bright.  To make the eyes appear wider:
  1. Prime the eye.
  2. Highlight under the brow and in the inner corner.
  3. Apply your medium-neutral shade over the lid.
  4. Starting in the outer corner, work your dark-neutral color into the crease about two thirds into the eye with a pencil brush. (MAC 219)
  5. Blend this line upwards and outwards, working in circular motions in the outer corner of the eye. (MAC 217)
  6. Apply your darkest shade to the outer corner of the eye and about a quarter of the way up the crease. (MAC 219)
  7. Blend this out as before. (MAC 217)
  8. Line the bottom lash line as close to the lashes as possible with your favorite black eye kohl.
  9. Line the upper lashes with your favorite liquid or gel liner. Make the line as thin as possible in the inner corner and slowly decrease the thickness as you approach the outer corner.
  10. Apply mascara. Focus on the outer lashes - don't apply mascara to the inner fourth of your lashes.


Wide Eyes

While this is generally not a preferred look, many women out there have very wide-set eyes. The solution is exactly the opposite of correcting narrow-set eyes - drawing attention to the inner corners while leaving the outer corners open. To make the eyes seem closer together:
  1. Prime the eye.
  2. Highlight under the brow
  3. Apply your medium-neutral shade over the lid.
  4. Starting in the middle, work your dark-neutral color into the crease, ending about one fourth from the outer corner of the eye. (MAC 219)
  5. Blend this line upwards and inwards, working in circular motions in the middle and inner corner of the eye. (MAC 217)
  6. Apply your darkest shade to the middle of the crease. (MAC 219)
  7. Blend this out as before. (MAC 217)
  8. Line the bottom lash line as close to the lashes as possible with your favorite black eye kohl, then line the inner corner of the lower water line.
  9. Line the upper lashes with your favorite liquid or gel liner. Make the line thinner in the outer corner, and thicker in the middle and inner corner of the eye..
  10. Apply mascara.

Small Eyes

This is generally a preferred look. This technique works by giving the illusion of moving the lash line, thus making the eyes seem bigger or smaller. To make the eyes appear bigger:
  1. Prime the eye.
  2. Highlight under the brow and in the inner corner.
  3. Apply your medium-neutral shade over the lid.
  4. Starting slightly above the outer corner, work your dark-neutral color into the crease about two thirds into the eye with a pencil brush. Draw your crease slightly higher than where it normally is. (MAC 219)
  5. Blend this line upwards and outwards, working in circular motions in the outer corner of the eye. (MAC 217)
  6. Apply your darkest shade slightly above the outer corner of the eye and about a quarter of the way up the crease. (MAC 219)
  7. Blend this out as before. (MAC 217)
  8. Line the bottom lash line as close to the lashes as possible with your favorite black eye kohl.
  9. Line the lower waterline with a white eye kohl. If your eyes are slightly yellow, use a flesh-tone pencil instead of a white one.
  10. Tight line the upper lash line with your black eye kohl.
  11. Using your favorite black liquid or gel eyeliner, line the upper lash line as thinly as possible.
  12. Apply mascara. On the bottom lashes especially, only apply color to the ends of lashes.

Large Eyes

Yet again, this probably isn't the look most of us out there will be going for. However, there are people who's eyes may need a bit of diminishing. To make the eyes appear smaller:
  1. Prime the eye.
  2. Highlight under the brow
  3. Apply your medium-neutral shade over the lid.
  4. Starting in the middle, work your dark-neutral color into the crease, ending about one fourth from the outer corner of the eye. Work the color slightly down from the crease and onto your lid.(MAC 219)
  5. Blend this line into the crease using circular motions focused on the middle of the eye. (MAC 217)
  6. Apply your darkest shade to the middle of the crease. (MAC 219)
  7. Blend this out as before. (MAC 217)
  8. Line the lower water line with your favorite black eye kohl. Make sure you fully line the inner corner and tear duct. 
  9. Thickly line the upper lashes with your favorite liquid or gel liner.
  10. Apply mascara.
As always, follow me on Twitter, like me on Facebook, and visit my homepage at jaydhagberg.com.

Tuesday, January 1, 2013

The Kardashian Cheekbone, or, How to Highlight like a Drag Queen

The concept of highlighting and contouring is the foundation of all makeup application. Through the application of color we can emphasize, augment, and reshape our facial features. By using lighter colors we draw attention to features and create the illusion that they are further forward or more prominent. Darker colors recede and diminish features and draw attention away from them.

So what do Kim Kardashian and a drag queen have in common? A strong understanding of this fundamental concept. If you've ever seen a drag queen doing their makeup, such as on RuPaul's Drag Race, you might see something a little like this.


This is obviously an exaggeration of what "real girls" should be doing, but the concept still stands. Through highlighting the cheekbones, lines of the chin, and roundness of the forehead are accentuated. Through shadowing the hollows of the cheek appear deeper and the eyes more proportional. Eyes are re-shaped and pulled apart, and the nose is straightened and made to appear smaller.


Below is a guide to highlight and contour.

Choosing Color

Choosing a highlight and contour color is the first big step in the process. For sake of simplicity, I'll be using Mac shades and products, but you can use whatever products you like.

Highlight - Start with your normal foundation color and go one or two shades lighter. For example, if you're a Mac NW25 like myself, use an NW20 for your highlight. Stay in the same color family as your foundation. So if I'm an NW foundation (neutral-warm) I wouldn't use a cool tone (NC) highlight, and vice versa.

Contour - As with highlight, go one or two shades darker and stay in the same color family. Since I'm an NW25, I use something along the lines of an NW30, however I usually use a different product to contour, which I will discuss below.

Type of Product

There are several different products one can use to to highlight and contour the face, but they all boil down into two categories.

Cream/Liquid - These are products that need to be set with a powder. A colored powder over the top of these will make the color look much more natural. You can use liquid or cream foundations such as Mac Studio Fix Liquid or Mac Full Coverage, or a concealer such as Mac Studio Finish concealer. These products do not blend as easily as powders, but lend a more natural-looking finish.

Powder - These products can be used to set foundations or applied over an already-powdered face. You can use powder foundations such as Mac Studio Fix powder, or setting powders such as Mac Mineralize Skin Finish Natural. Powders blend easily on the skin, but over-application can make a face look cakey and too matte. These are the products I tend to favor contour, which you will see in my personal highlighting and contouring routine below. 

My Preferred Highlight and Contour Routine

  1. Cleanse, moisturize and prime.
  2. Concealer and Foundation - Use your favorite concealers to conceal any problem areas and then lightly apply your favorite liquid or cream foundation. I use Mac Studio Fix fluid in NW 25. Don't set your foundation yet!
  3. Highlight - Using a cream product, highlight the areas you want to draw attention to. I use Mac Studio Finish concealer in NW 20.
    1. Highlight the center of the forehead in a circular motion.
    2. Starting at the inner corner of the eye, highlight down the sides of the nose, and make a line from the nostril towards your hairline at a forty-five degree angle. Fill in this triangular area.
    3. Highlight a thin line down the bridge of the nose. Make sure this line is straight, because if it's not, it will make your nose appear crooked.
    4. Starting at your ear, highlight a line across your jaw line to the chin, and up the other side.
    5. Blend the edges of your highlight, either with your fingers or a buffing brush. 
  4. Powder - Set your foundation and highlight with a neutral setting powder, or a colored powder in the same color as your foundation.
  5. Contour - Using a powder contour your face. I use Mac Mineralize Skin Finish in Deep-Dark
    1. Contour the hollows of your cheeks. Suck in your cheeks and apply the powder to the indentation.
    2. Contour your temples and around your hairline. 
    3. Contour the sides of your nose.
    4. Contour under your jaw line.
  6. Proceed with makeup as usual!

As always, follow me on Twitter, like me on Facebook, and visit my homepage at jaydhagberg.com.

Sunday, December 30, 2012

Thing 2012 has taught me.

2012 has been quite the year for me. I traveled the world, met a lot of new and interesting people, and have grown a lot as an artist. Here's a short list of thing I have learned as a makeup artist this year.

1. The client is always right. This should be a no-brainer, but this is something that's really been pounded into my head this year. They want more blood on an fx makeup, even though it's going to completely cover all the detailed prosthetic work you've done? You add more blood. They want an orange lip that clashes horribly with everything else you've done on the model? You do the orange lip. At the end of the day, they're the ones writing your paycheck and passing your name along. Your job is to paint their vision in the best light possible.

2. Clean everything. Double, no triple clean everything. Empty out your kit and sanitize the inside. Clean your brushes after every use. Sanitize your hands. Wipe down and spray down all products, including powders. I'm a bit of a clean freak when it comes to makeup, as every good artist should be, but I've been hearing more and more horror stories of models getting sick or getting pink eye because their artist was lazy. Don't do it, plain and simple. Not only does it put your job at risk, but the health of the client as well.

3. Practice makes perfect. This holds true in any art form, but especially in makeup. There's always something new to learn. If you have some free time practice on yourself or a friend. There's no such thing as perfection, but it's something we all should be striving for.

5. Know more than you think you need to. I'm a makeup artist, nothing more. However, I can't even begin to count the times I've been ask to style hair, or do a model's nails, or help with costumes, or this or that. Know how to do everything. You never know what a client or a photographer is going to ask of you, and if you don't know how to do what they're asking, they'll hire someone else who does next time.

5. Be yourself. Don't get too bogged down with the stresses of the job. After all, it's only makeup. Have fun, enjoy the process,  and learn from every look. Most importantly, make everything you do and every look you create your own. Make it personal. Make it the best.

As always, you can follow me on Twitter, like me on Facebook, and visit my website!

Wednesday, December 26, 2012

3 Products I Should Have Purchased Sooner

So this time of year is always so retrospective. I've been looking through my portfolio of all the things I've done and realized there are a few products that I've stumbled across this year that I can't live without. In no particular order,


Mac Fix+

This is one that recently I haven't been able to live without. Back in the day I read so many reviews ranting about how it's "just water in a bottle" and how it doesn't fix makeup and how it's generally useless. Maybe I'm reading all the wrong reviews, but this is something I've come to love dearly.

Things I use it for:

  • Combating too much powder - This works great for taking away the ashiness and cakey look from an over-powdered face. It also works great in conjunction with powder foundations, such as Mac's StudioFix Powder - simply buff it on heavily, and spray it away with some Fix+!
  • As a medium - I find it works better than water or other mediums for applying eyeshadows wet or using them as cake liner. Just spray down your brush with one or two pumps, and apply as usual! The color will be more concentrated, darker, and more vibrant than you thought possible.
  • Refreshing - Models I've worked with love this stuff. No one knows better than them how uncomfortable it can be to sit under hot photography lights for a few hours. While powdering in between takes, I spray them down with a few pumps of Fix+ to tone down the powder as well as give them some much needed refreshment. 


Things I don't use it for:

  • Fixing Makeup - That's the only misleading thing about the products title - it doesn't work well as a makeup fixant. For looks that need to last and require a fixant I lean toward Ben Nye's Final Seal, or most recently Skindinavia's finishing spray. (Thanks to GossMakeupArtist)


Urban Decay's Primer Potion

Here's another one that I know a lot of you are thinking, "Wait. What? You've seriously never used this stuff?" The answer is no, not until recently. As a theatrical and fx makeup artist slowly delving into the world of beauty makeup, a good primer has never been extremely high up on my list. 

Things I use it for:
  • Priming the eye - Dab a little on the eyelid, rub it around and go! Eyeshadows will last all night and be twice as vibrant.
  • Finishing the eye - Especially on male clients! The thing I love about this stuff is that it's a nice neutral flesh tone, and can be used by itself to simply remove discoloration and even out skin tone. 

Kryolan Bruise Wheel

I sent a friend to pick up a few things from a local theatrical supply company, one of which was my trusty, rusty Ben Nye bruise wheel. This is what she came back with. At first I was frustrated and ready to go back and exchange it, but then I decided to play around with it. The effects I can pull off with this one are simply stunning! The colors are much more muted and natural than then Ben Nye wheel and require far less blending and muddling to get them to look right. Also they are far creamier than the Ben Nye colors and go on like a dream.

Things I use it for:
  • Bruising - I think this one's pretty self explanatory. Work with the red/blue/purple colors in the area, being careful not to over blend, and work in some of the green/yellow/beige around the edges. 
  • Everything - Lately I've been using this a lot, especially the blue and burgundy tones. Mix them in with lip color to achieve a great oxblood lip.
What are some products you've gotten this year that you can't live without? Leave them in the comments below!

As always, follow me on Twitter, like me on FaceBook, and visit my homepage at jaydhagberg.com!

Tuesday, October 23, 2012

Favorites: Dark December.

Here are some swatches of a couple of my favorite dark shades by Mac. These three are all very popular shades, and are all indispensable in my kit. All three shades are shown from top to bottom: applied with fix+, over Urban Decay's Primer Potion in Original, and by itself.
Carbon
This matte black is invaluable when it comes to creating the perfect dramatic smokey eye or setting eyeliner. Carbon has been getting a lot of flack recently for not being the "blackest" black out there, which I tend to agree with. However, I feel that anything darker is too inky and doesn't have enough definition to work on the eye.
Satin Taupe
This is one of the few shimmer shades I find myself reaching for time and time again. It's great on the lid blended out with some Espresso, or even lighter browns like Kid or Soft Brown. The gorgeous purple-grey undertones work great with golden-brown eyes.
Espresso
Also another favorite of mine when it comes to smokey eyes. This shade work great for adding definition to the crease and even used as eyeliner with a little bit of fix+ and a push liner brush.